Showing posts with label cake. Show all posts

Monday, June 17, 2013

Thomas The Train Visits A Birthday Party!

I have been neglecting my blog a bit lately. My apologies. I had a LOT of stuff going on the last couple of months!

If you don't know by my infrequent postings, i am a home hobby baker. I am finding my way around cake decorating kind of like a blind person finds their way around an unfamiliar room. I just feel my way, learning as i go. Therefore, it's really exciting for me to see my cakes take form, and every success feels like a marathon with a photo finish.

Back in April, my nephew turned 5. He requested a Thomas the Train cake. My son loves Thomas back when he was a kid as well, so this was an exciting cake for me to take on. I had a kind of visual in my head, and my husband kind of gave his 2 cents, and i was off like a shot.

I knew i wanted there to be a tunnel. When i think of trains i think of tunnels into hillsides and long trestle bridges.

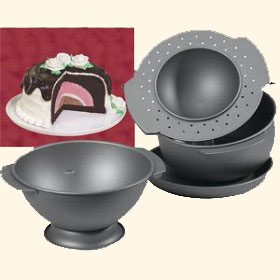
I baked a dome shaped cake in my Betty Crocker Bake N' Fill dome pan, and then i cut it in half for my hillside. Then i frosted it in a nice brown shade.


I used Royal icing for the tunnel details and the rails, brown sugar for dirt, and i piped some happy little trees using a star tip.


The toy i chose to use was a Happy Birthday Thomas the Train, and i took cues from how the train was decorated and piped colorful streamers of red, yellow, and blue in Royal icing for a festive border. Next time i would probably use buttercream icing instead because it was brittle and the kids at the party wanted to poke it, but it looked nice until they started messing with it.


My nephew was happy, and so was everyone else, because it was simply delicious!

Friday, March 15, 2013

Hello Kitty Birthday Cake

I made a cake last week for my friend and yoga teacher. Her daughter turned 6 and wanted a Hello Kitty cake.


I had the perfect idea in mind for the cake. I wanted to try and do an icing transfer! I keep trying new things, because i like to push myself to see what i can accomplish and this seemed like something i could manage.

I went to the store and found a very cute Hello Kitty coloring book. I planned out a 9" two-layer cake, so i found an image in the book that would fit. I took a cookie sheet and put the coloring page on it, already taped to the back of a sheet of freezer paper that i cut to fit. Then i taped both pages to the cookie tray so it wouldn't move around.

When i have seen transfers done on the internet, i have mostly seen buttercream icing transfers, but i wanted a glossy flat look for mine. So i made a batch of royal icing and i portioned out some icing of piping thickness into bowls and colored them black (for the eyes and whiskers), a bit of yellow (for her nose), some pink and blue (for her jumper and shirt), some red (for her bow), and i portioned out a good amount of plain white (for her body outline).

With my remaining icing, i added a bit of water to make some icing of a flooding consistency and colored portions as i did for the outlines.

This was nerve racking for me, honestly. I hadn't had time for a test on my method, and the flooding icing took ages to set. I was terrified she'd crack and i'd have to start over.

I let it sit overnight and went to bed with a bit of a prayer on my lips.

Now, when i do something for the first time, i always learn something important. In this cake, i learned that i CAN make this method work, but i originally imagined i'd use the side against the freezer paper as my "up side". But when i peeled the paper off of my transfer, i learned that it doesn't work quite that way. The paper side of the transfer wasn't perfect. There were a couple of air holes and it was far too flat and not very glossy and a little... grainy for lack of a better word.

So i had to improvise. I went ahead and laid her, flat and grainy side up, on the cake. I took my icing bags and piped my outline all over again and filled her in. I heaved a huge sigh of relief that that part was done and moved on.

I bought pre-made Wilton posies because i don't have the tools to really work with flowers yet (or any experience in making them for that matter) and arranged them on the cake.


I decided she would look really cute with stars around her, and so i used my freezer paper method and made some stars. I made 7 (the little girl was turning 6 and i wanted an extra one in case one broke) and my daughter poked her fingers in 2 of them when i wasn't in the room. So i placed 5 dried stars on the cake and i crossed my fingers and piped the bottom one directly on the cake. Stars are HARD.


It was a fairly simple design, but it certainly did turn out cute! My little one asked if i would make a cake just like this for HER birthday! She'll probably change her mind before August, but  maybe not.

You can't tell much in the photos, but there are tiny pink candy beads around the bottom of the cake. I need to learn to pipe shell designs. I'm hoping to take some Wilton classes this spring or summer, so i will have some actual training under my belt. Being a hobby baker is hard in the respect that you're constantly teaching yourself and crossing your fingers in hopes that your ideas will work. On the up side, every time i complete a cake, i feel very accomplished. And that's a pretty awesome feeling!

Saturday, January 26, 2013

Once Upon A Dream

One of my all-time favorite Disney movies is Sleeping Beauty. It's one of those movies that makes every little princess-loving little girl sigh with wistful wonder that someday their price will come.

Mind you, i have already informed my older daughter that if she does in fact have a prince waiting out there, she'll probably have to go rescue him from whatever dark forest he got lost in, but hey, not all princes are as perfect as our Shining Knight, Prince Phillip.

One of my friends asked me if i could make a cake for her little girl, who also adores Aurora. Of course i said yes!

I don't know about you, but my favorite scene in the movie is when Briar Rose strolls off into the forest to fetch berries while her "aunts" finish up her birthday preparations. It still gives me shivers. I love her voice, and the songs, and the owl who steals Prince Phillip's cloak... its wonderful.

That was the scene i wished to re-create with my cake.

I happened to find the most perfect Disney figurines, and i was all set.


"I'll love you at once, the way i did once upon a dream...."


My other figurines didn't really have a place on the cake, so i decided to have them hang around it instead. 

I'm also very proud of myself for learning (sort of) how to use my Left #107 tip for the flowery rosette borders. So far i haven't really gotten the hang of making any scalloped borders or anything. I used some Spring themed Wilton sprinkles for the fallen leaves of the forest, the daisies floating down the stream, and the wildflowers and butterflies (none of which i thought to get a good close photo of).

My friend said it was delicious and i know her daughter just loved it because i saw her face when i brought it over. It made my whole day!
Monday, December 31, 2012

The Tastiest Gift Of All

My oldest daughter turned a whopping *9* years old right before Christmas.

I honestly can't figure out where the time goes.

When i asked her what kind of birthday cake she wanted this year, she said "I want my cake to be a present, with a bow made out of fondant."

I told her i had never done a bow before. She said "I know! I am challenging you!"

Oh, boy. No more Cake Boss for her! See what i got myself into? A kid who wants to challenge mom's skills! Let's face it, each cake is a new experience anyhow, but she really went for one of those techniques that make me freak out on the inside.

I went onto YouTube and started watching some videos on making fondant bows. These ladies make it look so easy.

Turns out, they're not easy at all!

It might help if i had a ribbon cutter. But i don't. I thought it looked like something i could do freehand with my knife and a ruler. Then i came up with the idea to use the guides on my large fondant roller to help me out. I probably would have been better off with a stick ruler. Lesson learned.

I was kind of rushed, so i didn't do any pictures of the process. I had 5 kids under the age of 9 in my house all weekend, the youngest being not even 2, so i skipped all that.

I was semi-pleased with my result. I am a big perfectionist, and the bow was driving me insane. I should have stayed up extra late cutting ribbon pieces to dry overnight instead of assuming a couple of hours dry time would be enough.

It's difficult to see in the photos but i used lustre dust (in gold) all over the cake with a dry brush. I didn't brush the bow loops because they were already wanting to sink and i didn't want to encourage them. The whole cake glittered and it was a really lovely effect, and much nicer than plain matte teal.

I definitely think i could improve a lot of things on my next attempt at bows, but that's what i am all about. You have to try it in order to learn.

I have some new tools to add to my wish list, and a new cake under my belt, and my daughter was happy, and my kids being happy on their birthdays makes every cake i make for them a success!

Ta-Da!


I was still cranky about the bow but i did the best i could, and for my first attempt, i think it was decent enough.

I also hope it's awhile before i need to do another one. I need to practice.

Wednesday, November 28, 2012

Zebra Striped Belly Cake

I had the wonderful opportunity to make a baby shower cake last week! As an added bonus, it was for family, which makes it all the more special.

I had a lot of 'firsts' involved in this cake. 

1. It was my first baby shower cake. 
2. It is the first cake i have successfully covered entirely in fondant. 
3. It's the first cake that i had an audience for basically from start to finish.
4. It's the first cake i ever traveled elsewhere to make.

All of those things made me a little nervous, but combined... well, let's just say i am glad i do well under pressure.

Before i ever left home, i wanted to make sure this cake would WORK. I had to do a test cake.

When i Googled baby belly cakes, i read on a site (i don't know where) that another baker used a Wilton Mini-Ball pan, and a Wilton Ball pan to make the breasts and belly, but when i got them both in the mail, i realized the Ball pan was too small (or at least it was in my opinion). Looking around my kitchen, the only acceptable alternative i had was using my round Betty Crocker Bake N' Fill pan, and try to bake a cake without using the insert. The hard part about this is you have to experiment with temperature and time. My original cake recipe (a yellow cake) called for a 350° oven and i had to lower it to 325° when i realized that the outside was going to get overdone if i wasn't careful. All total, here and away, i made the belly portion of this cake 4 times, twice per cake, to get my final product right.

The Mini-ball pan was a dream. The cakes puff up rounded, so the breasts of my cake looked bigger and rounder than if they had had flat bottoms. I was very pleased with the pan's performance (and no, i don't get paid to say that, i just like it when stuff works like it's supposed to - or even better). I did trim a little edge off of one but that was probably my fault for either slightly overfilling the pan, or the oven could be slightly unlevel.

Here's a few pictures of my progression on my test cake. I didn't do too many.

Dirty iced and ready to be covered in fondant.


It draped very nicely along the 'hemline'.


I trimmed off the excess fondant and smoothed it out over the whole cake.


Then i added the zebra stripes and ribbon.


Now, for the actual baby shower cake, the plan was to make the bodice hot pink. It really added a blast of color, and it matched the decorations and theme perfectly.


Monday, October 1, 2012

German Chocolate & Camo Cupcakes

Something terrible happened last week.

It was actually a day i have feared for a very long time.

My son, my oldest baby, my longtime joy... turned 18.

See, i told you!! It was horrible!

Okay, well it wasn't HORRIBLE. Not really. But i was sad. And i cried. Not like a river of tears, but there were a few. And maybe a sniffle. And chocolate.

Speaking of chocolate! (See how my brain switches gears?) When i asked him what he wanted, he was very specific. He wanted a German chocolate cake. It's his favorite! (Mine, too!) So i said i would do that for his actual birthday (which was on Thursday) and i would make him camo cupcakes for when he invited friends over for a cookout. He liked the idea.

This was actually the first German chocolate cake i have ever made from scratch. Every time i said i was making it from scratch, if someone new was in the conversation, they'd say "Even the frosting?" Yes, even the frosting. I don't think anyone i know had ever had one totally from scratch before, so i was interested to see how similar the frosting would be to what you get in a can.

It. Was. Amazing. Heaven on a plate. Seriously. This is the kind of cake that can kill a diet. Or even make you decide cake is better than being skinny and ever getting your butt in those size 7's again.

My husband actually hid the rest of the cake away in our bedroom to prevent teenage boys from eating it in the middle of the night during their sleepover. It was that good.

I didn't toast my coconut or pecans because my recipe, which came from my BH&G cook book, did not ask me too. I saw other recipes saying to do it but i hate toasting coconut if i don't have to. 


For his birthday, the camo cupcakes! You make them a lot like you make any other multi-colored cupcake. I got the tutorial i used from Pinterest, and i will link you there. I feel uncomfortable doing things i see on Pinterest and making my own tutorial on it, you know? So, here is the link: CLICK!


My icing looks so creamy soft. Normally the edges of my icing fray a little. I have to remember that less sugar is better sometimes.


These were fun to make and everyone really loved them. I didn't have ANY left when everyone left, thanks to the teenage boys. Not that i really thought i would.


A Doll Cake For My Dollface

This last couple of weeks i have been very busy! It's amazing, really, how much i have crammed into my life lately.

Late August kicks off what i fondly term "Birthday Season".Of course, you may have seen my daughter's Pixie Hollow cake, but this whole thing escalates in September, when birthdays are rampant. Thankfully, not everyone wants me to make cake. I would never leave my kitchen!

Midway through September is my beautiful niece's birthday. She is our gorgeous brunette, the only one in her whole generation (of our tiny family branch).

She asked for a doll cake for her birthday. I was a little nervous, but excited!

I have to admit, i had this elaborate vision in my head of what i could do to a doll cake if i had time and tools and, i admit it, a heck of a lot more skill than i currently possess. It was gorg. She would have a fondant dress, and it would cut away in the front for a petticoat, and there would be ruffles...

In my head.

However, that proved to be way more difficult than i expected. Just the dress alone gave me fits and i *finally* figured out a place in my life where math could be useful. That's right. I said it. This one time.

Dress logistics aside, it was honestly one of my easier cakes. If i had stuck to icing and not tried to wrestle for 2 hours with fondant, i could have been done a lot quicker, and don't think i won't remember that next time.

I chose a Skipper™ doll for the doll portion of the cake, specifically because she looks so very much like my niece. Even so, she was almost too tall for the cake. I had to bend her knees and put her in a semi-chair pose to get her in there, and even then her hips stuck out of the cake by at least an inch. Next time, i won't be afraid to fill the pan even further to make the cake taller. Even so, a regular sized Barbie would probably not fit. The box says the pan dimensions are 5 1/2 inches tall, and that is far shorter than a standard Barbie™ doll's legs. I think i measured a regular doll at at least 7 1/2 inches from hips to the balls of her feet.

With icing, you can't tell the doll was slightly too tall.

So, she wanted a strawberry cake swirled with white cake. I had an even better idea. Strawberry zebra cake! Yum! It's a King Arthur Flour recipe, but i modified it for my own use here. I made 2 bowls of white cake batter. In one bowl i used a box of thawed and drained strawberries plus a couple tablespoons of the drained juice and mixed it into a strawberry flavored cake.

You pour a big dollop of one color into the pan. Then you add a big dollop of the other color batter in the middle of the first dollop. You keep doing this over and over and the cake batter spreads, and it creates this zebra pattern on the inside. It's really cool! I did this to the inside of the doll cake as well.


In order to make strawberry buttercream icing, i creamed by butter, and then added the remainder of the juice from the strawberries i thawed for the cake and beat that and the butter really well. Then i added in my powdered sugar and added in some strawberry flavoring i got at the store because i didn't think there was enough and wanted it to really taste like strawberries.


See, this is my poof that i CAN work with fondant, at least in small batches. lol


Fully decorated doll cake. I was trying to go for two-tones ruffles, but mainly all you can see is purple.


I wanted there to be enough cake for whoever might be there, and the doll cake was only about 8 inches in diameter. So i made a dance floor for her to stand on. My writing could still use work.


The finished product at the party! Not too shabby!


The inside of the cake:


I learned a lot of lessons with this one. Which is sort of the point. I enjoyed making this cake as much as the birthday girl enjoyed receiving it!


Monday, September 3, 2012

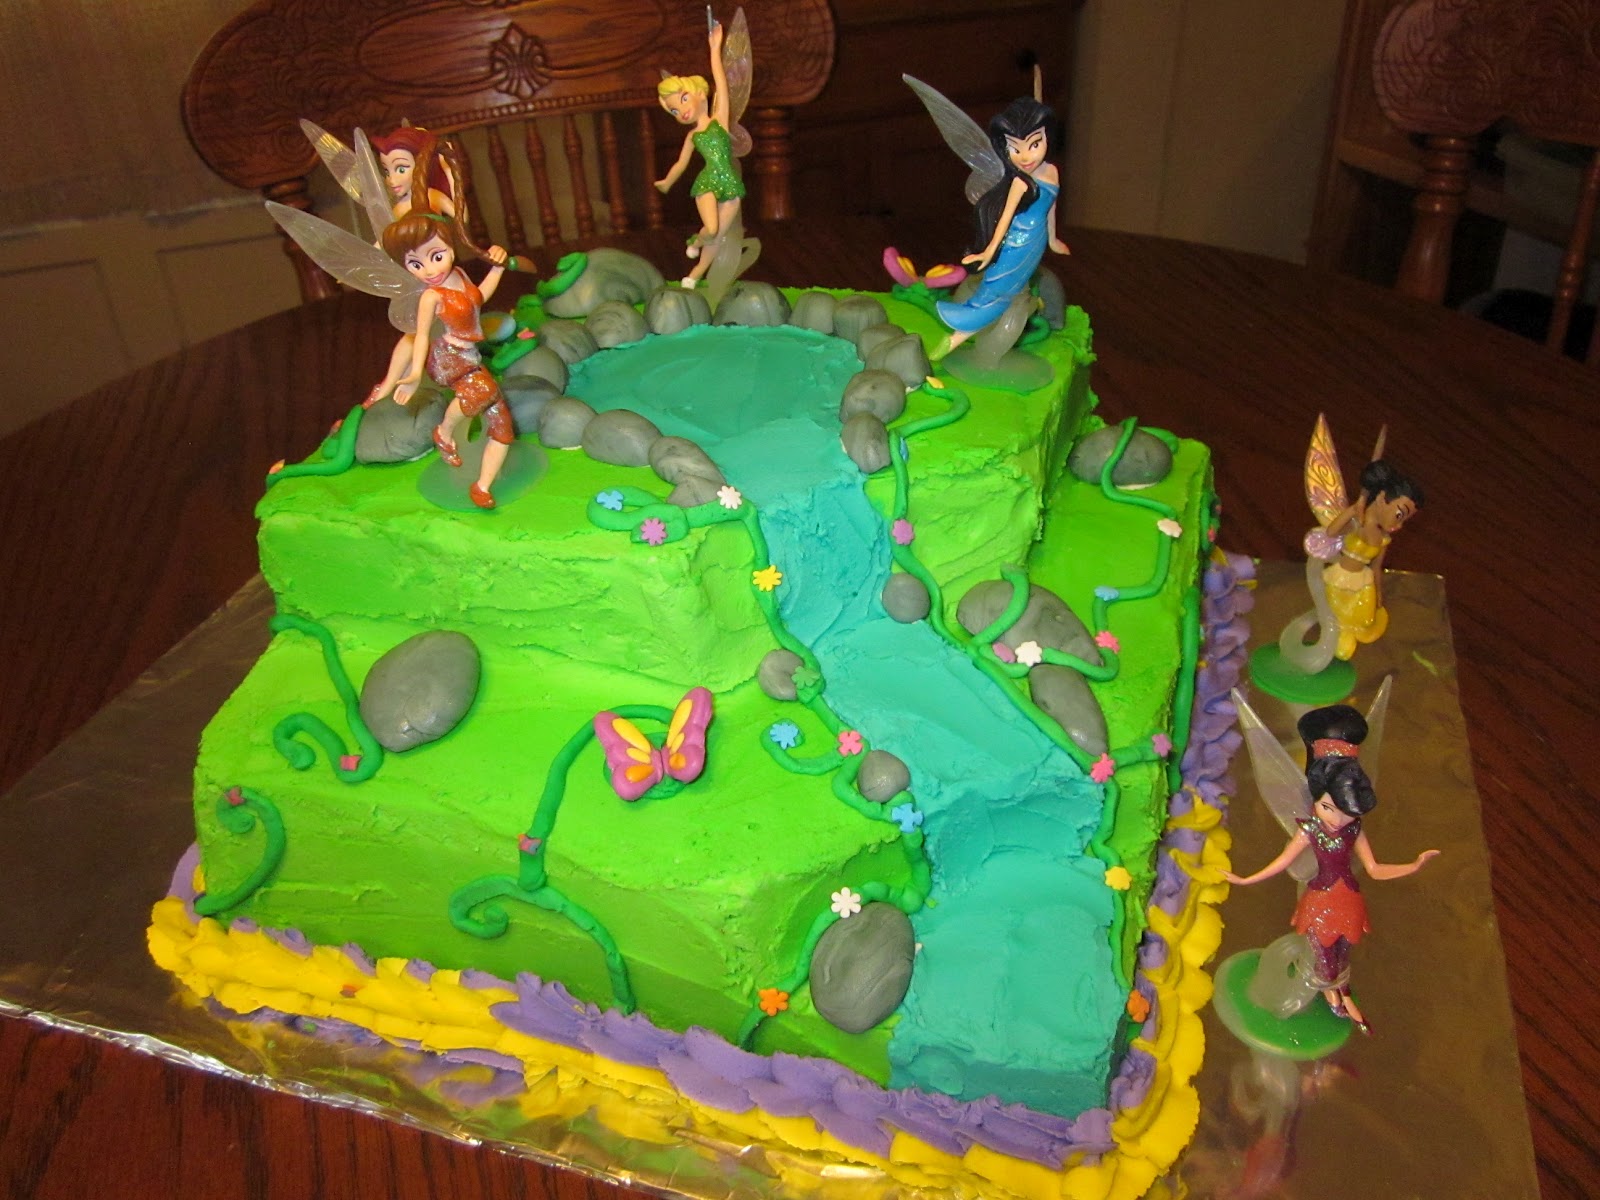
Pixie Hollow Cake

My daughter turned 5 years old last week, and a few weeks ago i asked her what kind of cake she would like for her birthday. She said Tinkerbell. We looked around the internet and i saw a definite theme with cakes. She said she wanted one with 'lots of fairies'.

I looked around in some stores but no one had any fairies i liked. It's really hard to find little Tinkerbell toys right now. You can find lots of big dolls though. So i hit up Amazon and found a really cute set of fairies that i thought would work as cake toppers.

I had this vision in my head for a BIG cake. Way too big for the amount of people i actually needed to serve. But when i go for it, i generally go big.

However, i had a series of snafus and fail cakes while i was trying to bake. I learned, for example, how not to not make a chocolate chip cake. Who knew that was going to be so difficult? Twice, even? As if i was so sure it was somehow the cake's fault it failed, i had to do it again to see if it wasn't just a fluke that the first one didn't work. Turns out, it was me after all. Ah, life. Trial and error. Good times.

My end result turned out nicely, but there were tears and frustration before i was done.

Making cakes, i have realized that you have to be flexible and take the fail cakes with a resigned determination to succeed next time.

I ended up going with a marble cake. I took a plain white cake recipe and then i split it in half and put 1/4 cup of cocoa powder in it and mixed it so all my cake would require the same baking temperature and time.


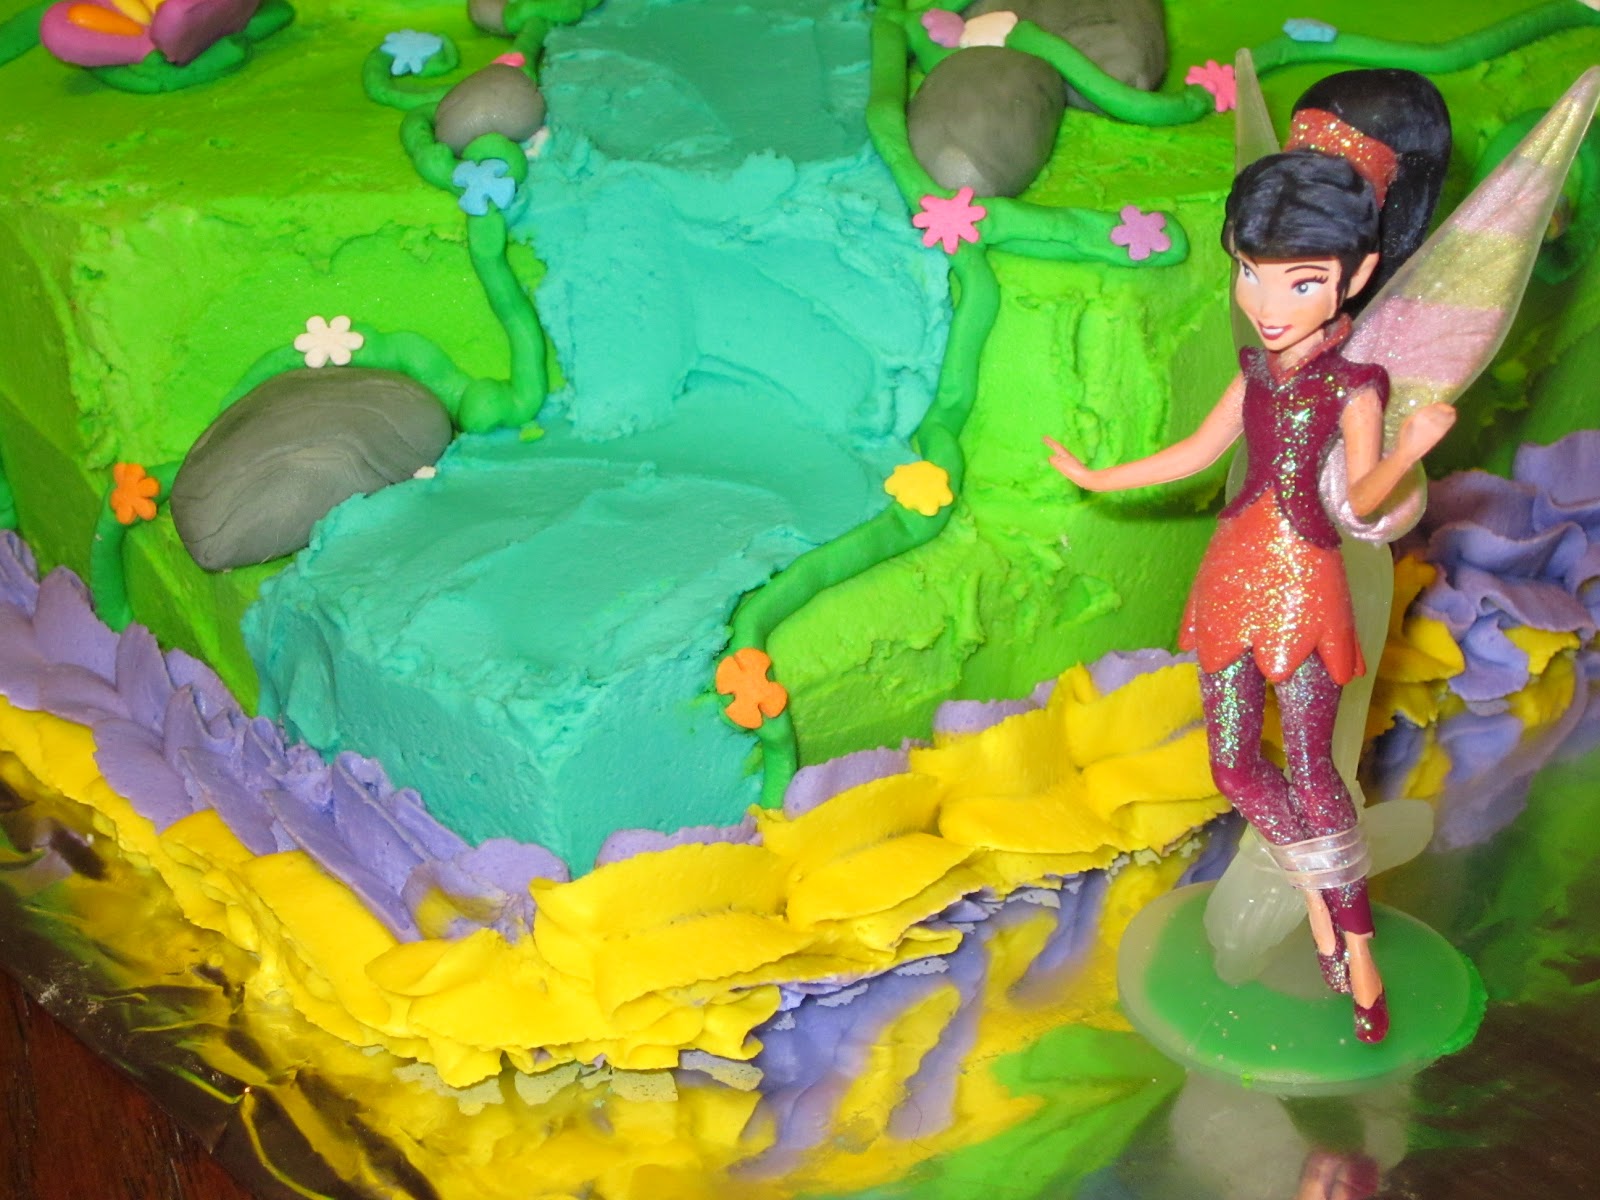
The finished product! I learned how to make much more realistic rocks for my lagoon and waterfall, which i am happy about!


I wasn't thrilled about my icing consistency. I need to experiment and find just the right balance for myself, because i wasn't able to get this icing as smooth as i normally strive for. I did get some nice color, however. And this was my first try at edging a cake, but i think i just need some practice.


I really do love the fairies cavorting about!


My daughter was SO thrilled. She told me it's *just* what she wanted. And if you Google fairy cakes, you will see a LOT of cakes in this same theme and with pools and waterfalls and stuff. I am just putting my own spin on a cake that gets a LOT of traffic and attempts. My personal goal is to challenge myself with what i can do. It doesn't all have to be original to be awesome.

This was a really fun cake to do, after i got the shape all figured out!

Monday, August 6, 2012

Car Chase Cake

I have had the busiest summer! Therefore, i have not been as active in the kitchen as i would like. However, we are returning to the beginning of what i fondly call "Birthday Season", and birthdays go from midsummer to mid-April, then i am done again for a few short months.

My friend asked me if i would bake a cake for her husband and his twin brother. Of course, i said yes. One of them is a cop, and one is a Harley-loving biker. So they wanted something like a road with a police car chasing a Harley. Totally a cute idea. I loved it.

I had my brain on this for quite a while, but in the end i decided to go for something fairly simple in design. I didn't want it to look anything like the cartoon-y Cars cake i made for my nephew.

So this is what i came up with!


The trees i simply piped about a million leaves on each one and it made them quite realistic looking, i think.


Here is the part that had me crossing my fingers. When i asked what size the road needed to be, she said "Matchbox car sized." I made sure i made the road plenty big in case we ended up with something not quite so small, so i am happy with the result! We had a good laugh over her chase to find the right sized vehicles in relation to each other.


I was very pleased with this cake, and i think everyone else was, too. Even if my friend's little boy did say my rocks looked like poo. Silly kid. Note to self: Experiment with making non-poo-ish rocks. Heh.

Nothing extremely special on the inside. Just a home made cake with BH&G recipes. Chocolate on one side, white on the other.

I did experiment with store bought fondant this time. MUCH easier to work with, although i like my cheap version too for the most part. But there is no way i was going to make homemade fondant THIS kind of black color, either.